Overview
Parts 1 and 2 of this series built an STM32 SX1262 encrypted LoRa link and hardened it: AES-CTR for confidentiality, AES-CMAC for authentication, a monotonic counter for replay protection, and FRAM persistence so that counter survives reboots. That is a lot of defensive machinery. The obvious next question — the one this tutorial answers — is: how do you know it actually works?
A security protocol that has only ever been fed well-formed frames has not been tested; it has been demonstrated. Real assurance comes from doing the opposite — deliberately transmitting malformed, corrupted, replayed, and boundary-value frames and confirming the receiver rejects every bad one, accepts every good one, and never halts. Part 3 walks through the QA harness in the project’s qaTests/ directory, which does exactly that.
As with the earlier parts, the full project source and Doxygen documentation are available to download in the Project Downloads section below. No code changes are required to follow along — this installment explains the QA code that already ships in the project package.
For background on AES, refer to the NIST AES specification.
What You Will Learn
- Why a security protocol must be tested with hostile input, not just valid traffic
- The verification model: a hostile TX generator against the real production RX
- How the
RADIOLINK_QA_TESTbuild switch swaps the application loop - The RX contract under test — reject without halting, never corrupt replay state
- How the hostile-frame builders in
protocol_qa.cconstruct each bad frame - How the QA harness loop drives the TX generator and the RX observer
- The full set of hostile and boundary tests, grouped by the defense each one probes
- How to read the harness output to tell an accepted frame from a rejected one
Prerequisites
This tutorial builds directly on the first two parts of the series. You should have read, or be comfortable with, the material in Part 1 and Part 2, in particular:
- The Wire v3 frame format — header fields, ciphertext, and CMAC tag
- The RX pipeline and its gate ordering: structural validation, CMAC, replay, decrypt
- What replay protection is and why the receiver keeps per-node replay state
- STM32CubeIDE, the STM32 HAL, and building/flashing the project
No cryptography beyond what Part 2 covered is needed. Part 3 is about exercising the protocol from Part 2, not extending it.
Materials List
- STM32 Nucleo-F439ZI development board (2× — one TX, one RX)
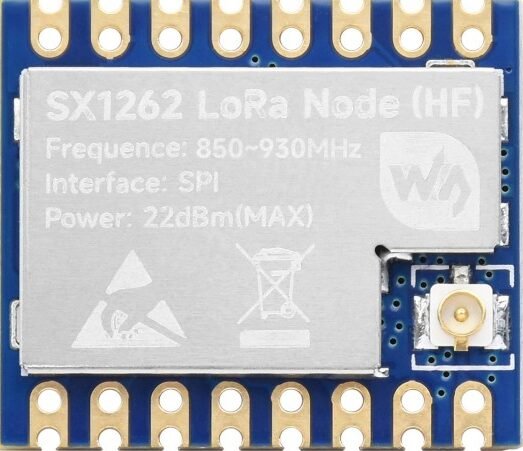
- SX1262 LoRa module (2×)
- Jumper wires and breadboard
- Two USB cables for power and ST-LINK debugging
- A serial terminal on each board’s ST-LINK VCP, to read the QA log output
- STM32CubeIDE (for building and flashing the project)
The FRAM module from Part 2 can stay connected, but the QA harness described here exercises the protocol parser; it does not depend on the FRAM being present.
Project Structure
The project layout is the same one used throughout the series. The directory that matters for this tutorial is qaTests/, which was deliberately set aside in Part 2 as “Part 3 territory.” It has two parts: qaTests/protocol/ holds the hostile-frame builders, and qaTests/qaApp/ holds the harness loop that drives them. The one other file in play is Core/Src/main.c, which carries the build switch that turns the harness on.
F439_CPP_TX-RX_LoRa_Project_01/
├── ADA1897_MB85RS64B/         <-- SPI FRAM driver (persistence layer)
│   ├── ada1897_mb85rs64b.c
│   └── ada1897_mb85rs64b.h
├── Core/                      <-- CubeMX-generated HAL + main.c
│   ├── Inc/
│   │   ├── main.h
│   │   ├── stm32f4xx_hal_conf.h
│   │   └── stm32f4xx_it.h
│   ├── Src/
│   │   ├── main.c
│   │   ├── stm32f4xx_hal_msp.c
│   │   ├── stm32f4xx_it.c
│   │   ├── syscalls.c
│   │   ├── sysmem.c
│   │   └── system_stm32f4xx.c
│   ├── Startup/
│   └── ThreadSafe/
├── Drivers/                   <-- ST HAL + CMSIS (CubeMX-managed)
├── SX1262/                    <-- SX1262 LoRa radio driver
│   ├── sx1262.c
│   └── sx1262.h
├── radioApp/                  <-- Application layer
│   ├── radio_app.c
│   └── radio_app.h
├── radioLink/                 <-- Protocol layer (Wire v3, crypto, replay)
│   ├── radio_link.c
│   ├── radio_link.h
│   └── radio_wire.h
├── qaTests/                   <-- Hostile-frame QA harness (covered in Part 3)
│   ├── protocol/
│   └── qaApp/
├── docs/                      <-- Doxygen output
├── scripts/                   <-- Build / instrumentation helpers
├── F439_CPP_TX-RX_LoRa_Project_01.ioc
├── STM32F439ZITX_FLASH.ld
├── Doxyfile
└── README.md
Hardware Configuration / Pinouts
Overview
The QA harness introduces no new hardware. The wiring is identical to Parts 1 and 2: two boards, each with an SX1262 module on the SPI bus, control lines (CS, BUSY, NRESET, DIO1) on GPIO, and the on-chip CRYP peripheral handling AES. One board is flashed as the TX node and one as the RX node — the same role split used by the production firmware.
What changes is purely in software: a build-time switch selects whether each board runs its normal production loop or the QA harness loop. The next section covers that switch.
Pinouts & Configurations
The full pin assignment and clock configuration for the project is exported from STM32CubeMX. Download the PDF below for the complete reference; it is unchanged from the earlier parts of the series.
[INSERT FILE BLOCK HERE — IOC PDF]
Project Setup
If you followed Parts 1 and 2, the project is already set up — the QA harness code ships in the same project package, and no CubeMX changes are needed. To follow along:
- Download and extract the project package linked at the end of this tutorial.
- Open the project in STM32CubeIDE.
- Open
qaTests/protocol/protocol_qa.candqaTests/qaApp/qa_app.calongside this tutorial — the walkthrough refers to them throughout. - Have a serial terminal ready on each board so you can watch the QA log lines as frames are sent and received.
The harness is gated entirely by one build switch, covered in the next section. Enabling it is the only configuration step.
Code Walkthrough
The walkthrough moves from the outside in. First the verification model — the idea that makes the harness trustworthy. Then the build switch that enables it, and the RX contract the harness checks against. Then the hostile-frame builders and the harness loop that drives them. Finally the seven tests themselves, grouped by the defense each one probes, and how to read the results.
From Building It to Breaking It
Every defensive feature in Part 2 makes an implicit promise. Structural validation promises a malformed frame will be rejected. CMAC promises a tampered or forged frame will be rejected. The replay check promises a captured frame replayed later will be rejected. Those are claims — and an untested claim about security is just optimism.
Worse, the failure mode of a security bug is silent. A protocol with a broken replay check still works perfectly for honest traffic; you only discover the gap when someone exploits it. The only way to gain real confidence is to take the position of an attacker on purpose: build the exact frames a hostile transmitter would send, put them on the air, and verify the receiver does the right thing with each one. That is what the QA harness automates.
The Verification Model: Real RX, Hostile TX
The single most important design decision in the harness is role separation, and it is worth stating plainly because it is what makes the results meaningful:
- The TX node runs a QA frame generator. It builds deliberately hostile and boundary-value frames and transmits them.
- The RX node runs the normal production receiver firmware. It is not a test-only receive path. It is the same parser, the same rejection logic, the same code that ships.
Why this matters: if the RX side ran special test code, a passing test would prove only that the test code is correct — it would say nothing about the firmware you actually deploy. By keeping RX on the production path and only making TX hostile, the harness validates the real rejection path. The single concession on the RX side is in logging: instead of treating a rejected frame as a fatal error, the QA observer prints the accept-or-reject result and keeps running, so a test run can exercise many frames in sequence.
Enabling the QA Harness
The harness is enabled by a single build-time switch in Core/Src/main.c, commented out by default:
/* Private define ------------------------------------------------------------*/
/* USER CODE BEGIN PD */
/* #define RADIOLINK_QA_TEST */
/* USER CODE END PD */Uncommenting #define RADIOLINK_QA_TEST and rebuilding flips the firmware from production behavior to QA behavior. It does so in two places. The main loop chooses which application loop to run:
#ifndef RADIOLINK_QA_TEST
      RadioApp_Loop();
#else
      QaApp_Loop();
#endifAnd the DIO1 external-interrupt callback routes the radio’s “done” signal to the QA handler instead of the production one:
void HAL_GPIO_EXTI_Callback(uint16_t pin) {
#ifndef RADIOLINK_QA_TEST
    RadioApp_OnDio1Exti(pin);
#else
    QaApp_OnDio1Exti(pin);
#endif
}That is the entire integration surface. When the switch is off, the project is exactly the production firmware from Parts 1 and 2. When it is on, main() calls QaApp_Loop() and interrupts are delivered to QaApp_OnDio1Exti(). Both boards are built with the switch enabled; the TX/RX role is selected the same way the production firmware selects it.
The RX Contract Under Test
Before looking at the frames, it is worth being precise about what “passing” means. The harness is not just checking accept-versus-reject. The receiver, when handed a hostile frame, must satisfy a four-part contract:
- Reject without halting. A bad frame must be discarded. It must never reach
Error_Handler()or otherwise stop the receiver. - Never mutate replay state on a rejected frame. A frame that fails any check must not leave a trace in the per-node replay table — otherwise an attacker could poison that state with junk frames.
- Keep processing. After rejecting a frame, the receiver must remain live and correctly handle the next frame that arrives.
- Still accept valid frames. The hardening must not be so aggressive that it rejects legitimate traffic — including frames at the maximum legal payload size.
Every test in the harness is ultimately checking some combination of these four properties. Keep them in mind as the individual tests come up.
The Hostile Frame Builders
The hostile frames are constructed in qaTests/protocol/protocol_qa.c. The builders share a simple, deliberate strategy: build a completely valid Wire v3 frame first, then corrupt exactly one thing. Changing a single field isolates what is being tested — if the receiver rejects the frame, you know precisely which defense did the rejecting.
The simplest builder produces a valid frame with no corruption at all — it exists so the replay test has a genuine, well-formed frame to send twice:
bool ProtocolQa_BuildReplayFrame(uint8_t *out,
                                 uint8_t outMax,
                                 uint8_t *outLen,
                                 uint32_t sessionSeqId,
                                 uint32_t msgCounter)
{
    static const uint8_t qaPayload[] = "QA replay frame";
    bool status = false;

    status = RadioLink_BuildWireV3Frame(out,
                                        outMax,
                                        1U,
                                        sessionSeqId,
                                        msgCounter,
                                        qaPayload,
                                        (uint8_t)(sizeof(qaPayload) - 1U),
                                        outLen);

    return status;
}It just calls RadioLink_BuildWireV3Frame() — the same production frame builder from Part 2 — with a fixed payload. Two other builders not shown here, ProtocolQa_BuildMaxPayloadFrame() and its helper ProtocolQa_FillPayloadPattern(), do the same thing at the maximum legal plaintext length, filling the payload with a deterministic printable pattern so the RX log is readable. Those cover the valid cases. The corruption happens in the next two.
The oversized-payload builder shows the “build valid, then corrupt” pattern clearly:
bool ProtocolQa_BuildOversizedPayloadFrame(uint8_t *out,
                                           uint8_t outMax,
                                           uint8_t *outLen,
                                           uint8_t *declaredPayloadLen,
                                           uint32_t sessionSeqId,
                                           uint32_t msgCounter)
{
    bool status = false;

    if (declaredPayloadLen == NULL) {
        return false;
    }

    status = ProtocolQa_BuildMaxPayloadFrame(out,
                                             outMax,
                                             outLen,
                                             sessionSeqId,
                                             msgCounter);

    if (!status) {
        return false;
    }

    *declaredPayloadLen = (uint8_t)(RADIOLINK_WIRE_V3_MAX_PLAINTEXT_LEN + 1U);
    out[RL_W3_OFF_PAYLOAD_LEN] = *declaredPayloadLen;

    return true;
}It builds a valid maximum-payload frame, then overwrites a single header byte — the payload-length field at offset RL_W3_OFF_PAYLOAD_LEN — with a value one larger than the maximum legal plaintext size. The frame is now internally inconsistent: its header claims more payload than the protocol permits. Everything else about the frame is untouched.
The invalid-nodeId builder follows the identical pattern, corrupting a different field:
bool ProtocolQa_BuildInvalidNodeIdFrame(uint8_t *out,
                                        uint8_t outMax,
                                        uint8_t *outLen,
                                        uint8_t *invalidNodeId,
                                        uint32_t sessionSeqId,
                                        uint32_t msgCounter)
{
    static const uint8_t qaPayload[] = "QA invalid nodeId";
    bool status = false;

    if (invalidNodeId == NULL) {
        return false;
    }

    status = RadioLink_BuildWireV3Frame(out,
                                        outMax,
                                        1U,
                                        sessionSeqId,
                                        msgCounter,
                                        qaPayload,
                                        (uint8_t)(sizeof(qaPayload) - 1U),
                                        outLen);

    if (!status) {
        return false;
    }

    *invalidNodeId = 0xFFU;
    out[RL_W3_OFF_NODE_ID] = *invalidNodeId;

    return true;
}It builds a valid frame, then overwrites the nodeId byte at RL_W3_OFF_NODE_ID with 0xFF. There is an important subtlety here that the tutorial should be honest about. The nodeId field is a single byte, and the receiver’s replay table has 256 entries — so a nodeId of 0xFF (255) is, strictly speaking, still a valid index into that table. The receiver’s bounds check is:
static bool radioLinkRxNodeIdIsValid(uint8_t nodeId)
{
    return (nodeId < (sizeof(gRadioLinkSeenV3) / sizeof(gRadioLinkSeenV3[0])));
}Because nodeId is a uint8_t and the table has 256 entries, this check can never actually fail — it is a defensive guard that documents intent and protects against future changes to either type. So what rejects the invalid-nodeId frame? The nodeId byte is overwritten after RadioLink_BuildWireV3Frame() has already computed the CMAC over the original header. Changing the nodeId invalidates the tag. The frame is therefore rejected at the CMAC stage, not the nodeId-bounds stage. This is still a correct rejection — a tampered header is exactly what CMAC exists to catch — and it is a good illustration of why authentication covers the whole header, not just the payload.
The QA Harness Loop
The harness loop lives in qaTests/qaApp/qa_app.c. Its top level is a single dispatch on the node’s role:
void QaApp_Loop(void)
{
    if (sx1262Role == SX_ROLE_TX) {
        QaApp_RunTxProtocolTest();
    } else {
        QaApp_RunRxProtocolObserver();
    }
}The RX side is the simpler of the two. It waits for a radio interrupt, processes it through the normal driver path, and — on a clean receive — hands the frame to the logging function:
static void QaApp_RunRxProtocolObserver(void)
{
    SX1262_IrqResult irqResult;

    if (!gQaIrqPending) {
        return;
    }

    gQaIrqPending = 0U;

    if (!SX1262_ProcessIrq(&sx, &irqResult)) {
        return;
    }

    if (irqResult.rx_done && !irqResult.crc_error) {
        ProtocolQa_LogRxFrameResult(&irqResult);
    }
}Note what it does not do: there is no test-specific parsing here. It calls SX1262_ProcessIrq() exactly as production code would, and the accept/reject decision happens inside ProtocolQa_LogRxFrameResult(), which calls the real RadioLink_ParseWireV3Frame(). The RX side is an observer of the production parser, not a replacement for it.
The TX side runs the actual test. Once per second it builds a hostile frame, transmits it, and logs what it sent:
static void QaApp_RunTxProtocolTest(void)
{
    static uint32_t lastSendMs;
    static uint32_t msgCounter;
    static uint32_t sessionSeqId = 1U;
    static uint8_t txInFlight;
    static uint8_t invalidNodeIdFrame[RADIOLINK_WIRE_RADIO_MAX_LEN];
    static uint8_t invalidNodeIdFrameLen;
    static uint8_t invalidNodeId;
    uint32_t now = 0U;
    bool status = false;

    now = HAL_GetTick();

    if (!txInFlight && ((now - lastSendMs) >= 1000U)) {
        lastSendMs = now;

        memset(invalidNodeIdFrame, 0, sizeof(invalidNodeIdFrame));

        status = ProtocolQa_BuildInvalidNodeIdFrame(invalidNodeIdFrame,
                                                    (uint8_t)sizeof(invalidNodeIdFrame),
                                                    &invalidNodeIdFrameLen,
                                                    &invalidNodeId,
                                                    sessionSeqId,
                                                    msgCounter);

        if (status) {
            status = SX1262_SendBytes(&sx, invalidNodeIdFrame, invalidNodeIdFrameLen);
        }

        if (status) {
            printf("QA TX: invalid nodeId=%u sess=%lu ctr=%lu\r\n",
                   (unsigned)invalidNodeId,
                   (unsigned long)sessionSeqId,
                   (unsigned long)msgCounter);
            txInFlight = 1U;
            msgCounter++;
        } else {
            printf("QA TX: invalid nodeId send failed\r\n");
        }
    }

    if (gQaIrqPending) {
        SX1262_IrqResult irqResult;

        gQaIrqPending = 0U;

        if (!SX1262_ProcessIrq(&sx, &irqResult)) {
            return;
        }

        if (irqResult.tx_done || irqResult.timeout) {
            txInFlight = 0U;
        }
    }
}Here is the honest, important detail about the harness as it ships: the TX loop exercises one test at a time. As written, it calls ProtocolQa_BuildInvalidNodeIdFrame() — so out of the box, the harness runs the invalid-nodeId case on a one-second cadence. The other hostile-frame builders are all present and fully implemented in protocol_qa.c; switching the harness to a different test is a one-line change in this loop, swapping the builder call (and the buffer it fills). The frame builders are the reusable test library; this loop is the harness that drives one of them. Treat the seven tests below as the catalog of what the library can construct, with the invalid-nodeId case being the one wired up by default.
The Hostile and Boundary Tests, by Defense
The project’s Doxygen documentation lists the verified test coverage. Rather than walk them as a flat list, it is clearer to group them by the Part 2 defense each one probes — the same order the RX pipeline checks a frame in: structural validation first, then authentication, then replay, with the valid boundary case as the control that must pass every gate.
Before walking the tests themselves, one honest note about the current state of the project. Three of the tests below — truncated frame, frame length mismatch, and CMAC authentication failure — are documented in the project’s verification model and described here as part of the harness’s intended catalog. However, they do not yet have corresponding builder functions in the current protocol_qa.c. They will be added in a future installment of this series; a specific timeframe is not committed. The four tests that are implemented — replay rejection, maximum payload acceptance, oversized payload rejection, and invalid nodeId rejection — are noted as such in their descriptions.
Group 1 — Structural validation. These frames are rejected before any cryptography runs, because the frame is not even internally well-formed. Four tests probe this layer:
- Truncated frame. A frame shorter than the 11-byte Wire v3 header is injected. Expected RX behavior: rejected, no halt, receiver continues. There is not enough data to even contain a valid header. (Documented in the verification model; builder not yet in
protocol_qa.c.) - Frame length mismatch. A frame whose declared payload length does not match the actual received frame size is injected. Expected RX behavior: rejected, no replay-state corruption, receiver continues. (Documented in the verification model; builder not yet in
protocol_qa.c.) - Oversized payload. A frame whose header declares a plaintext length larger than
RADIOLINK_WIRE_V3_MAX_PLAINTEXT_LENis injected — this is the builder shown earlier. Expected RX behavior: rejected, receiver continues. - Invalid nodeId. A frame carrying an out-of-expected-range node identifier is injected. The intent is to confirm an attacker-controlled nodeId cannot cause an out-of-bounds access into the replay table. As discussed above, in the shipped code this frame is actually caught at the CMAC stage, because corrupting the nodeId also breaks the tag — the frame is still correctly rejected and the replay table is still never indexed by a bad value.
Group 2 — Authentication. One test directly probes CMAC:
- CMAC authentication failure. A frame with an intentionally corrupted authentication tag is injected. Expected RX behavior: rejected, no plaintext accepted, receiver continues. This is the core authentication guarantee from Part 2 — without a valid tag, the payload is never even decrypted, let alone delivered. (Documented in the verification model; builder not yet in
protocol_qa.c.)
Group 3 — Replay. One test probes the replay check, and it is the one test that inherently requires sending two frames:
- Replay rejection. The same valid frame — identical
(nodeId, sessionSeqId, msgCounter)— is injected twice. Expected RX behavior: the first copy is accepted, the duplicate is rejected, and the replay state remains correct afterward. This is whyProtocolQa_BuildReplayFrame()builds a genuinely valid frame: a replay test is only meaningful if the frame would otherwise be accepted.
Group 4 — The valid boundary control. Not every test is hostile. One confirms the hardening has not gone too far:
- Maximum payload boundary acceptance. A frame containing the maximum legal plaintext size is transmitted. Expected RX behavior: accepted, payload decrypted successfully. This is the control case — it must pass every gate the hostile frames fail. A receiver that rejected this frame would be over-rejecting, which is its own kind of bug.
Reading the Results
All of the harness output is plain text over the serial terminal, produced by ProtocolQa_LogRxFrameResult() on the RX side. The function logs the frame header bytes, runs the production parser, and prints one of two outcomes:
void ProtocolQa_LogRxFrameResult(const SX1262_IrqResult *irqResult)
{
    uint8_t plainLen = 0U;
    uint8_t plain[256];
    uint32_t sessionSeqId = 0U;
    uint32_t msgCounter = 0U;
    bool accepted = false;

    memset(plain, 0, sizeof(plain));

    ProtocolQa_PrintRxHeader(irqResult);

    accepted = RadioLink_ParseWireV3Frame(irqResult->payload,
                                          irqResult->payload_len,
                                          plain,
                                          (uint8_t)sizeof(plain),
                                          &plainLen);

    if (irqResult->payload_len >= RADIOLINK_WIRE_V3_HDR_LEN_DERIVED) {
        sessionSeqId = ProtocolQa_DecodeLe32(&irqResult->payload[RL_W3_OFF_SESSION_SEQ_ID]);
        msgCounter = ProtocolQa_DecodeLe32(&irqResult->payload[RL_W3_OFF_MSG_COUNTER]);
    }

    if (!accepted) {
        printf("QA RX: rejected frame sess=%lu ctr=%lu RSSI=%d SNR=%d\r\n",
               (unsigned long)sessionSeqId,
               (unsigned long)msgCounter,
               irqResult->rssi_pkt,
               irqResult->snr_pkt);
        return;
    }

    if (plainLen < sizeof(plain)) {
        plain[plainLen] = '\0';
    } else {
        plain[sizeof(plain) - 1U] = '\0';
    }

    printf("QA RX: accepted [%s] sess=%lu ctr=%lu RSSI=%d SNR=%d\r\n",
           plain,
           (unsigned long)sessionSeqId,
           (unsigned long)msgCounter,
           irqResult->rssi_pkt,
           irqResult->snr_pkt);
}The two lines to watch for are the rejection log — QA RX: rejected frame … — and the acceptance log — QA RX: accepted […] …, which includes the decoded plaintext. For every hostile frame the TX side sends, the correct result is a rejected line and a receiver that immediately goes on to log the next frame. For the maximum-payload control frame, the correct result is an accepted line with the expected payload pattern decoded intact.
Reading the test is therefore a matter of pairing each QA TX: line with the QA RX: line it produces, and confirming the outcome matches the expected behavior for that test group. Crucially, the run should continue indefinitely: the receiver logging frame after frame, never halting, is itself the proof of the first and third parts of the RX contract — reject without halting, and keep processing.
That completes the QA picture. Parts 1 and 2 built the encrypted, authenticated, replay-resistant link; Part 3 is how that link is held to its promises — a hostile transmitter, the real production receiver, and a catalog of malformed, corrupted, replayed, and boundary-value frames, each with a defined correct outcome.
Project Downloads
The complete project source code used in this tutorial is available for download. This includes all necessary files to build and run the project, along with supporting documentation.
- Full STM32CubeIDE Project (Source + Configuration)
- Doxygen Documentation (docs/html/index.html)
- The
qaTests/QA harness: hostile-frame builders and the harness loop
If project source is not linked in the tutorial, it may be available on request — use the email contact option in the site footer.
Documentation
This project includes full Doxygen-generated documentation for all custom source files, including a dedicated protocol-verification page that describes the QA harness, the verification model, and the verified test coverage in detail.
The documentation is included within the project download and can be viewed locally by opening:
F439_CPP_TX-RX_LoRa_Project_01/docs/html/index.htmlin a web browser.
The documentation provides detailed descriptions of functions, data structures, and module interactions to assist with understanding and extending the project.
If you have questions or run into trouble getting the boards programmed and talking to each other, post in the Tutorial Support forum and I will work through it with you. If project source is not linked in the tutorial, it may be available on request — use the email contact option in the site footer.